


Beelink SER4 Mini PC Teardown Review
I found that most of the authors on the Internet about the review of the Mini PC of the Beelink SER4 are in the same direction. All are product unboxing + detailed introduction, and then use the software to run the scoring routine, and then use several "carefully selected" games to tell you that it can run smoothly, and finally come to Beelink SER4, a mini PC for office work Entertainment can do the conclusion. This kind of content is actually helpful to users who have purchase needs, but I think it is far from enough. Today, I will share the method of improving the performance of the Beelink SER4 Mini PC from another perspective, and attach its detailed disassembly tutorial.
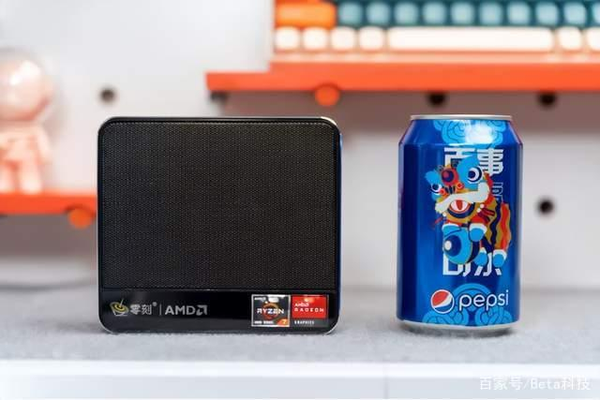
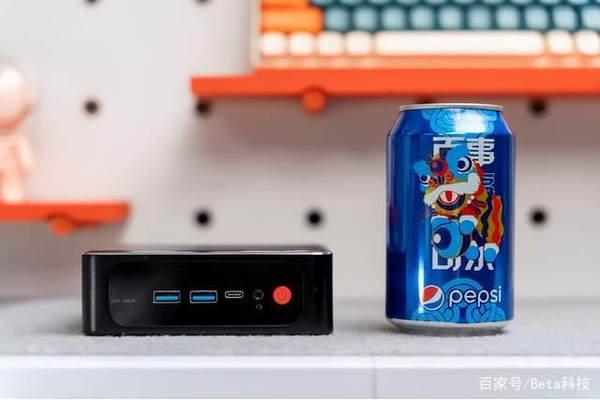
Regarding the unboxing of Beelink SER4, I will skip it here. Some big guys have made a very detailed introduction to the unboxing. If you are interested, you can search for it. Put two physical pictures, let everyone feel the real size of this Mini PC. Its width and height are basically the same as cans of cola, and it is less than half the thickness of cans, and its volume is only about 0.56 liters.
Beelink SER4 built-in AMD 4800U processor. The 4800U is an 8-core 16-thread CPU with a base frequency of 1.8GHz and a maximum turbo frequency of 4.2GHz. The SER4 I bought came standard with a 500GB intel 660p solid state drive, a single 16GB DDR4 memory, and a frequency of 3200MHz. Run Master Lu with the factory configuration and score 586349 points.
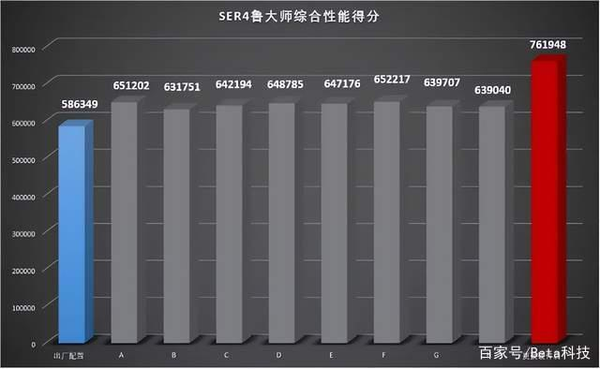
The tests of other bigwigs are almost all adding a 16GB memory with the same specifications as the original to form a dual channel for the SER4. Compared with the 586,000 points of the factory configuration, it is basically only about 70,000 points of improvement.

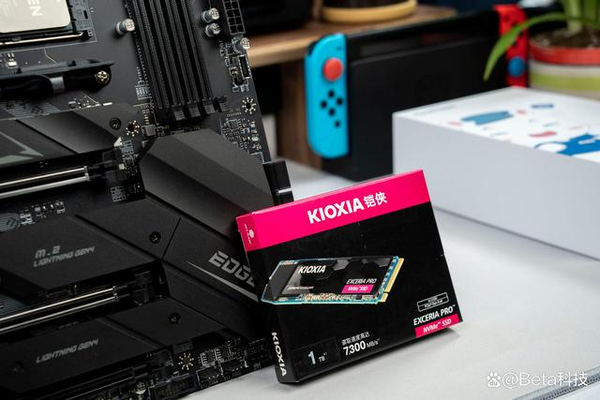
Those who are familiar with computer hardware should know that dual-channel memory is very obvious for improving the performance of the Mini PC. Especially for AMD's CPU with core display, it is more sensitive to the performance of dual-channel memory. In order to improve the performance of SER4, I replaced the intel P660 with Kioxia EXCERIA Pro SE10, and replaced the memory with two Asgard 16GB DDR4 3200MHz memory, forming a dual channel. In the end, Master Lu scored 761,948 points, an increase of about 175,000 points and a performance improvement of about 29.9%.
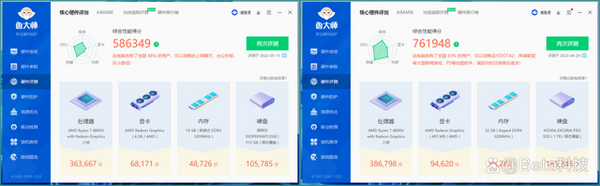
Attached are two Master Lu scores for comparison. After replacing the solid state drive and memory, the performance of the graphics card, memory and hard disk has been greatly improved, especially the performance of the memory has almost doubled directly.
Intel 660p uses QLC particles, and the official nominal sequential read and write speeds are 1500MB/s and 1000MB/s respectively. Although this speed is far higher than that of SATA solid-state drives, it is still comparable to high-end NVMe solid-state drives. big gap. The official nominal sequential read and write speeds of the Kioxia EXCERIA Pro SE10 are 7300MB/s and 6400MB/s respectively. Using a PCIe 4.0 solid state drive on a SER4 with only PCIe 3.0 specifications seems a bit wasteful, but at least it can prove that the speed of the hard drive has a relatively large impact on the performance of the Mini PC.
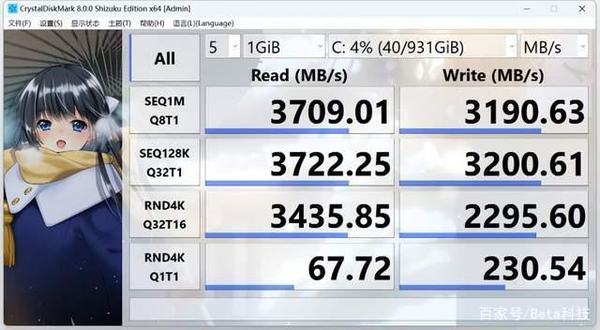
The read and write speed of Kioxia EXCERIA Pro SE10 on SER4 is shown in the figure above.

Compared with solid-state drives, the performance improvement of dual-channel memory is very huge. The two Asgard So-Dimm DDR4 Rams in my hand have a single memory capacity of 16GB and a frequency of 3200MHz. Now the price of memory is relatively cheap, and the price advantage of domestic memory is more obvious. Two 16GB memory is only a little more than 700. Thinking of a 8GB DDR4 2400MHz memory that I spent more than 700 yuan to buy a few years ago, it hurts too much. Have you ever spent a lot of money on memory?

Generally, the internal space of notebooks or mini-Mini PCs is very limited, so it is rare to see notebook memory with metal heat dissipation vests on the market. But notebook memory also has the ideal of pursuing heat dissipation. Asgard's solution is to add heat dissipation stickers to this memory. At first, I thought that the memory was just an ordinary decorative sticker, but when I tore off the sticker, I found that the sticker was very thick and should have a certain thermal conductivity.
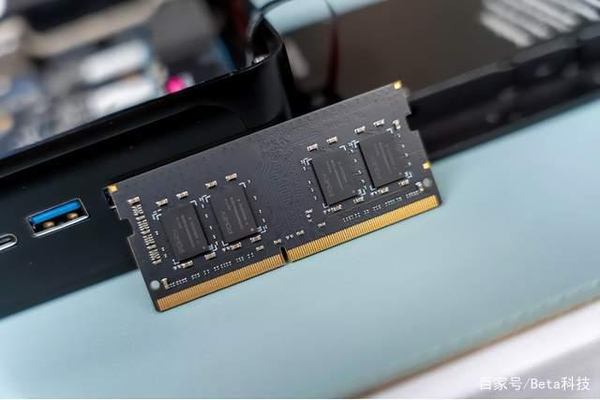
The memory uses 8 double-sided granules to form a 16GB capacity. Although the color of the PCB board is not directly related to its performance, the black PCB board of Asgard's memory looks more technological than the green PCB of Emerald.
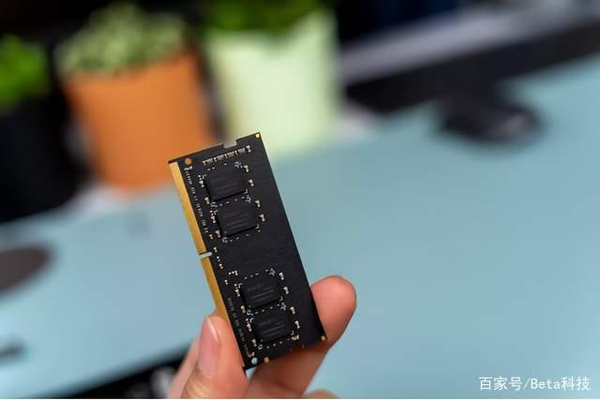
Some people may worry about the quality of domestic products. Asgard provides a lifetime warranty for this memory. Asgard should be very confident in the quality of its own products before it dares to provide a lifetime warranty. Now the technology of domestic memory is very mature, domestic memory particles are more and more used, and the key price is cheaper. With the competition of domestic memory, those international big-name memory will not dare to raise the price easily, and it is our consumers who get the benefit in the end.
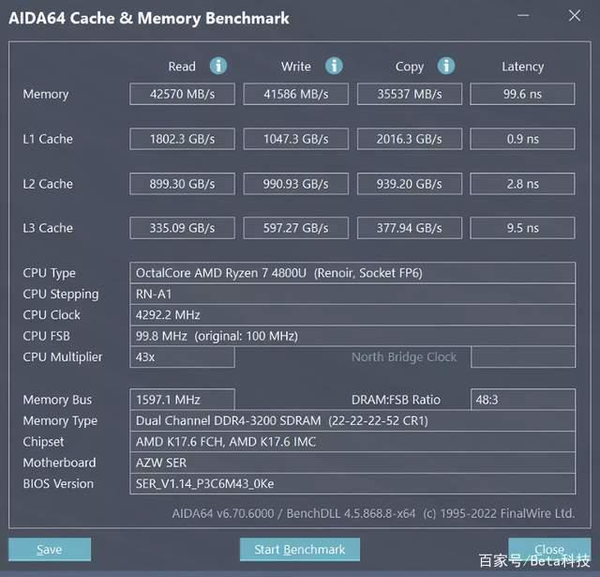
The timing of this memory is 22-22-22-52, and the operating voltage is 1.2V. Using AIDA64 to test the memory bandwidth is 42570MB/s for reading, 41586MB/s for writing, and 35537MB/s for copying.
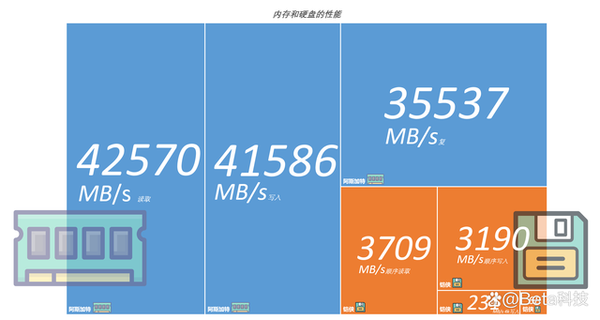
I have summarized the performance of memory and solid-state drives so that you can understand their performance more intuitively. After replacing the solid state drive and memory, the overall performance of the SER4 far exceeds the results evaluated by other bigwigs.
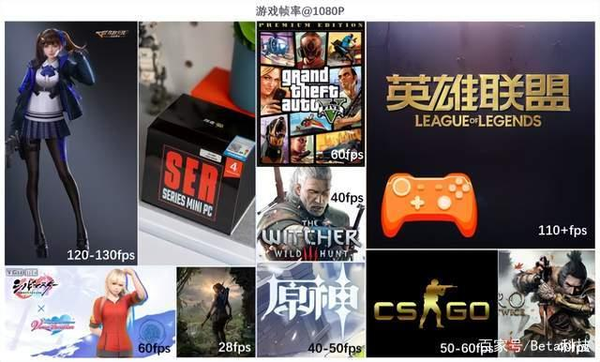
Regarding the game performance of SER4, I have compiled the above table after reading the relevant evaluations of many big guys on the Internet, listing the frame rate of related games. The games in the picture are basically games that SER4 can run smoothly with lower picture quality at 1080P resolution. In fact, for this mini-Mini PC, the performance is not enough to support mainstream games, and there must be a trade-off between smoothness and picture quality. SER4 is more than enough for office work and watching videos. In terms of games, I would recommend it to play classic games such as Red Alert 2, CS1.6 and Diablo 2. There is no need to worry about the smoothness.
After talking about the performance part, go directly to the dismantling of SER4. Many people may be more interested in the internal structure of the Mini PC. At present, the detailed disassembly process of this Mini PC has not been found on the Internet.
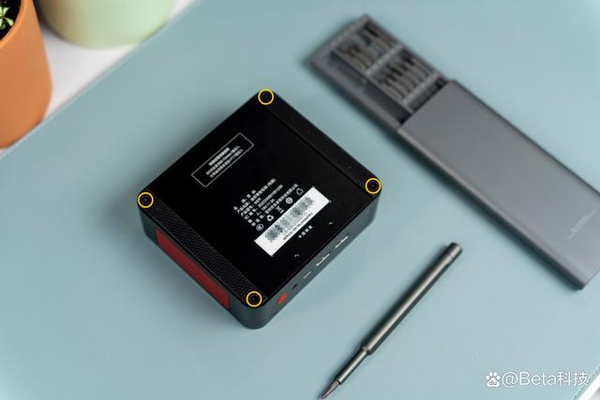
To disassemble the Mini PC, start from the back. Unscrew the four screws on the back of the Mini PC (the positions marked in the yellow circle) to disassemble the bottom cover of the Mini PC.
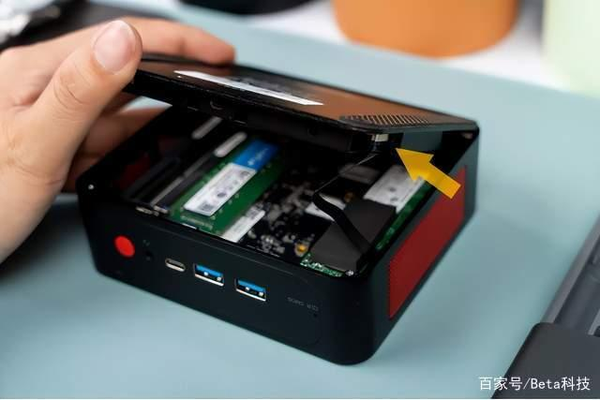
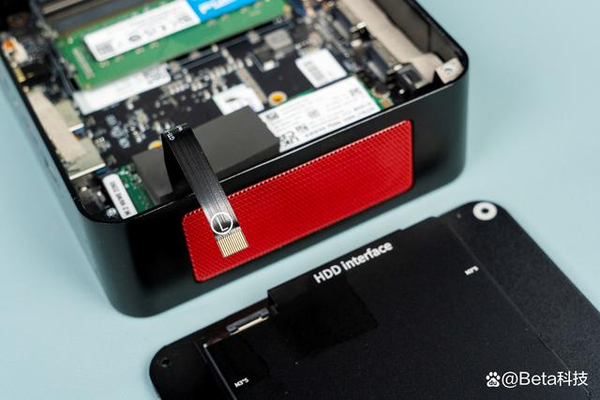
Be careful when opening the lid, not too much. There is a data cable connected to the SATA hard disk at the position pointed by the arrow, be careful not to break the data cable.
Lay the bottom cover flat on the desktop to facilitate the removal of the hard disk data cable later.
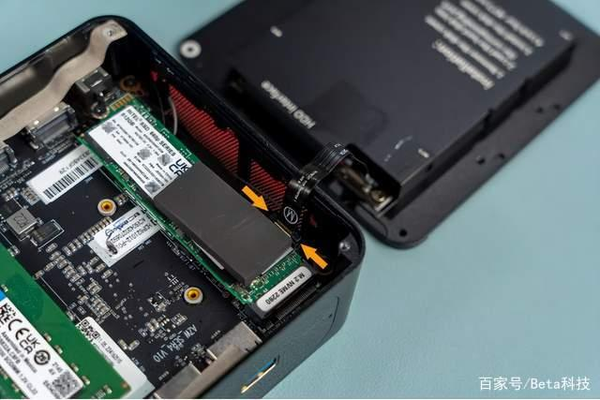
Lift the clips on both sides of the data cable (the positions indicated by the arrows in the above picture) upwards to open the clips and take out the cable. Do the same on the other side of the cable. In this process, pay attention to use skillful energy, and you must not force miracles.
This is how the cable is taken out.
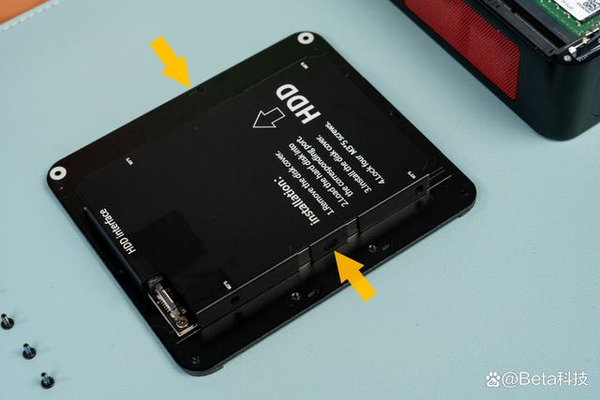
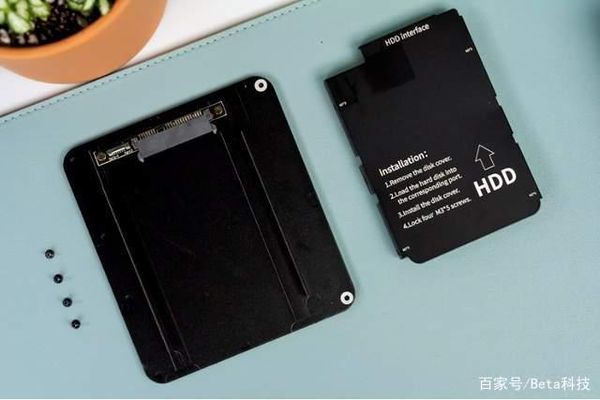
A 2.5-inch hard drive bay is integrated on the bottom cover of the Mini PC, and the hard drive protective cover is fixed by a buckle (the position indicated by the arrow above). It takes a relatively large amount of force to open the cover. When disassembling, you can rest assured and use force. If the metal cover is deformed, it can be restored by pinching it with your hand.
After removing the protective cover of the hard disk, you can see that the interface of the SATA hard disk is fixed on the backplane.
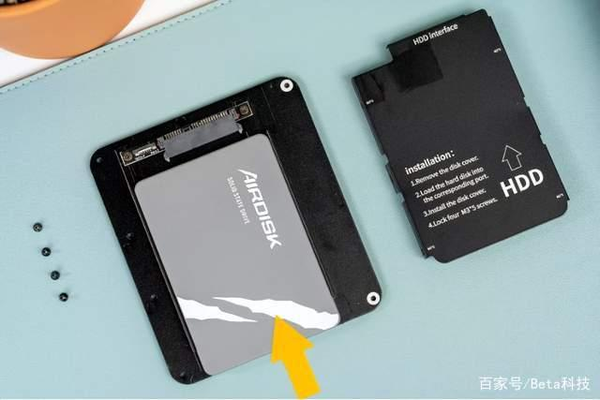
The 2.5-inch SATA hard disk is inserted into the hard disk position by means of a flat push (in the direction of the arrow). In the case of adding a protective cover, the hard disk compartment can only install hard disks with a thickness of 7mm. If the thickness of the hard disk in your hand is larger than this value, you can consider not installing the cover, and fix it directly on the hard disk position with screws.
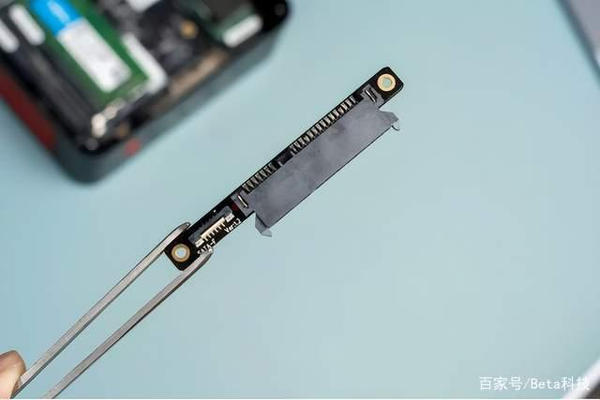
Unscrew the two fixing screws to remove the SATA hard drive interface.
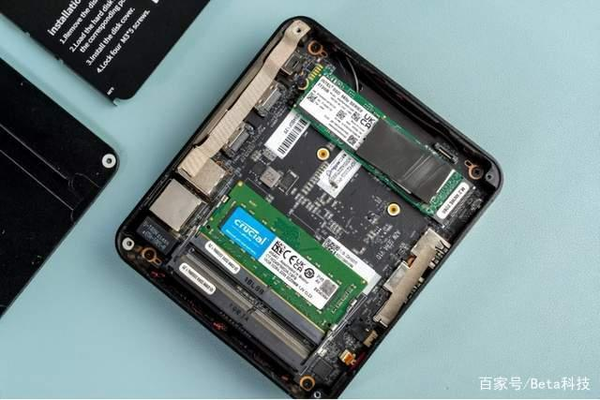
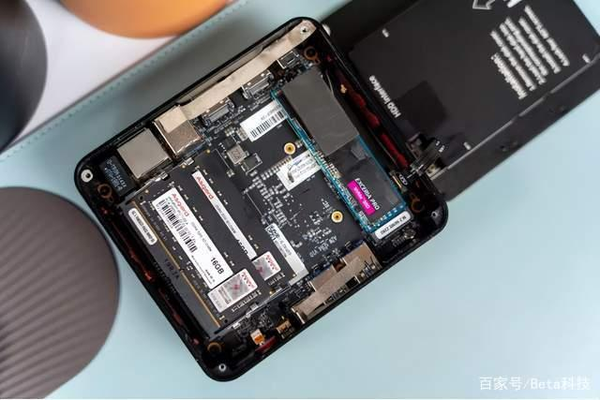
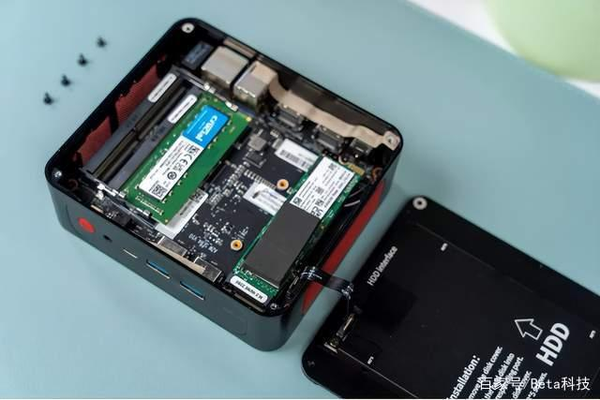
After removing the bottom cover, the interior of the SER4 can be seen at a glance. It can be seen that SER4 has only one NVMe hard disk slot and 2 SO-DIMM notebook memory slots. A 500GB intel 660p solid-state drive and a 16GB intel memory are built into the factory. There is also a large thermal silica gel on the solid state drive to enhance the heat dissipation of the hard drive.
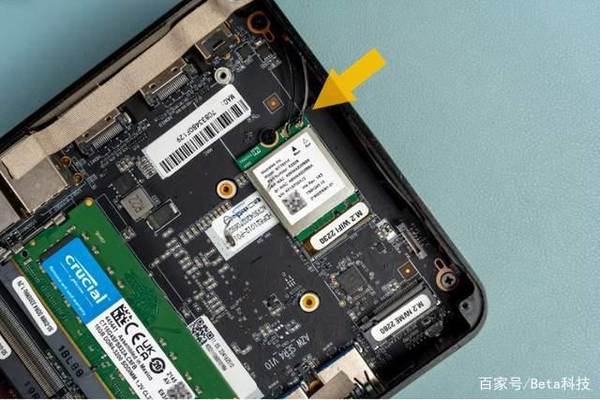
After removing the solid-state drive, you can see that the wireless network card of M2230 specification, model RZ608, supports WiFi6E and Bluetooth 5.2 under the hard disk. Before continuing the disassembly, you need to unplug the antenna of the wireless network card. The position of the antenna holder is fixed with black glue, and the black glue needs to be carefully removed when disassembling. This process must be done lightly, because I dismantled the seat of the wireless network card rudely and lost a wireless network card.
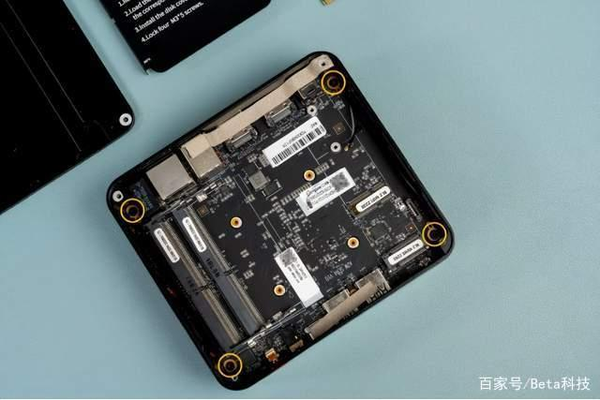
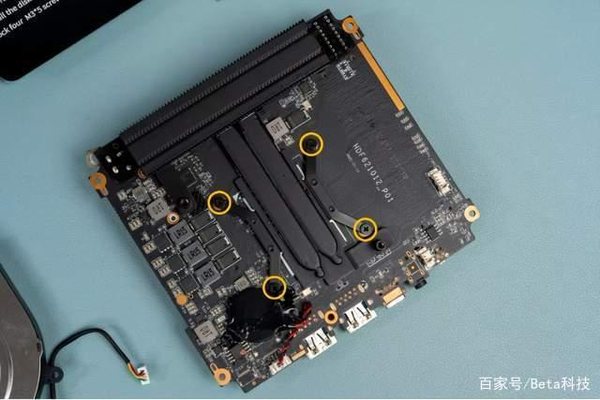
The motherboard can be removed after removing the memory, SSD, wireless card and antenna. The motherboard is fixed by four screws at the four corners.
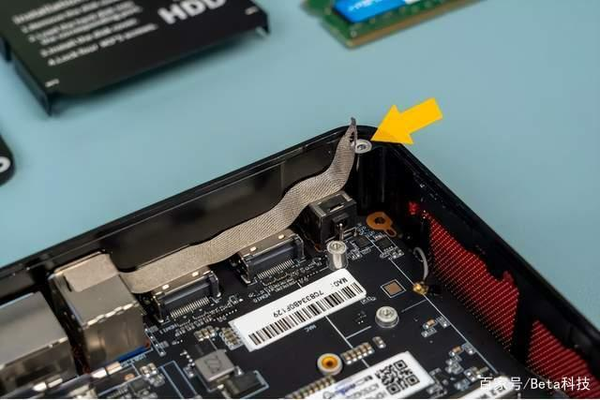
Before taking the motherboard, remove the metal shielding cloth on the top corner of the HDMI interface (the position indicated by the arrow), just peel off a point on the corner, not all of it.
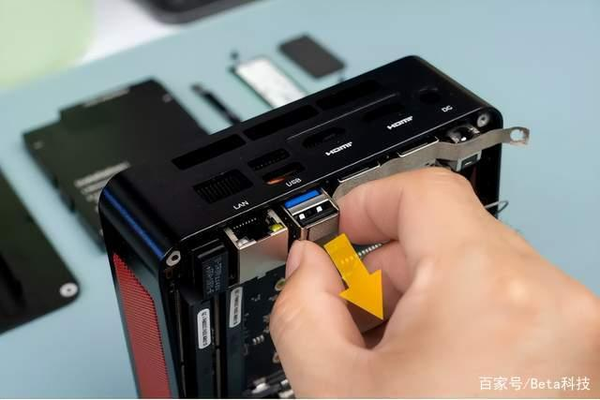
The gap between the motherboard and the Mini PC shell is very small, and it is difficult to remove the motherboard. Pinch the protruding position of the USB port and apply force in the direction of the arrow to easily remove the motherboard.
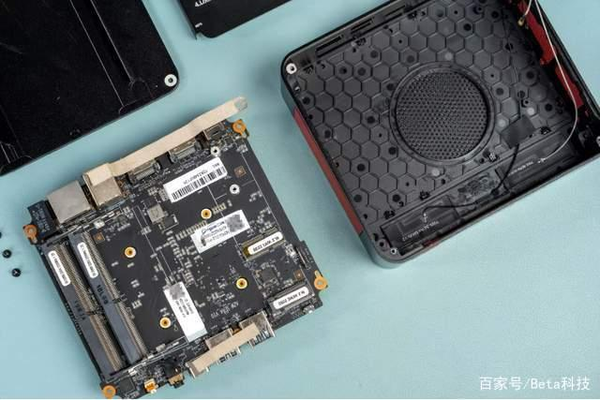
After taking out the motherboard, you can see that the workmanship of the mainframe casing is still very meticulous. Ventilation holes are designed at the corresponding positions of the fans. Other parts have hexagonal patterns to enhance the strength of the upper panel. The transceiver antenna of the wireless network card is glued to the Mini PC shell.
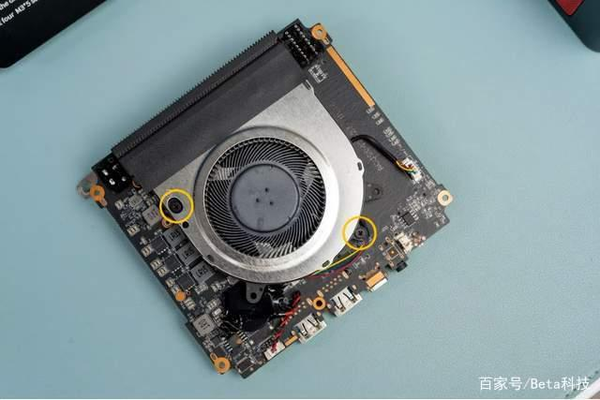
Turning over the back of the motherboard can see the relatively large cooling fan. The fan is fixed by 2 screws. Remove the two screws and unplug the power cord to remove the fan.

Before taking the fan, it should be noted that the connection between the fan and the cooling fins is sealed with an insulating sticker, which can ensure that the wind blown by the fan will not leak from the seams of the cooling fins.
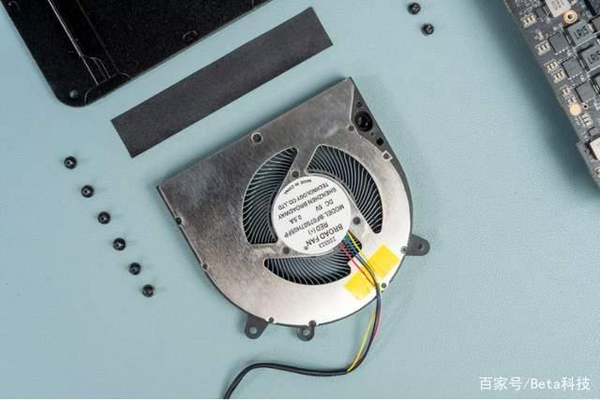
Fan parameters DC 5V/0.5A.
If you remove the fan, you can see that this Mini PC uses 2 heat pipes for heat dissipation, which is almost the same scheme as most notebooks. The heat pipe is fixed to the motherboard by 4 screws. Among them, the BIOS battery of the motherboard is near the screw position in the lower left corner. The battery is also fixed with black glue. Afraid of dismantling the motherboard again, I did not remove the BIOS battery.
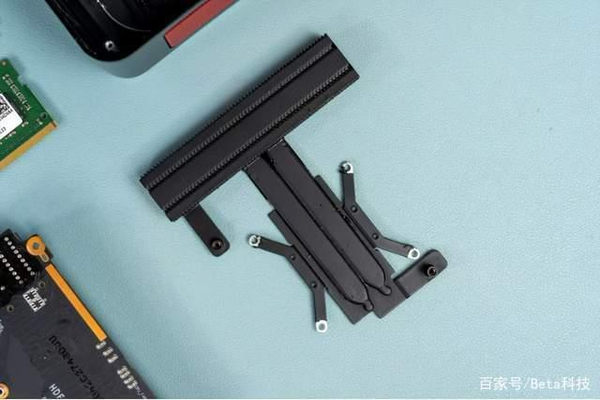
The disassembled cooling system looks like the picture above, with 2 heat pipes connected to the dense cooling fins.
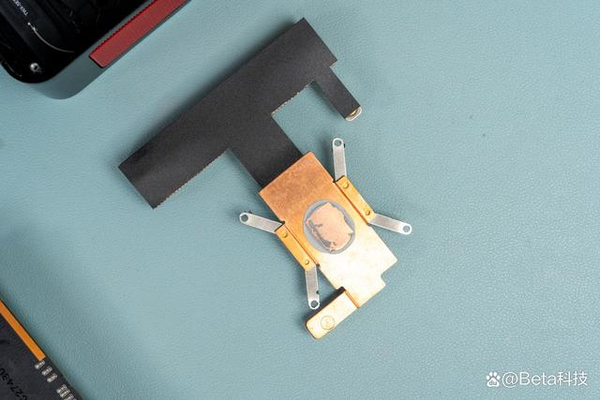
The back of the heat pipe is an all-copper thermally conductive base. The position of the cooling fins is also covered with insulating stickers.
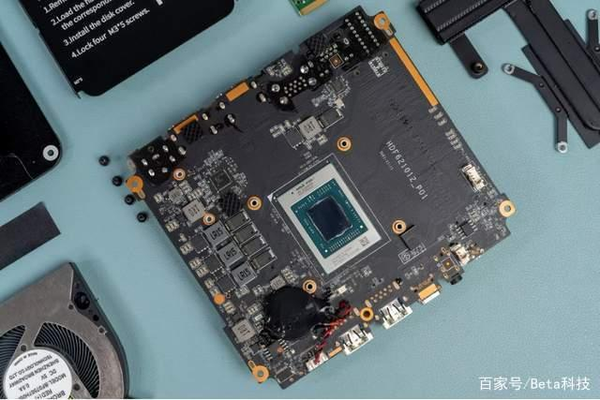
After removing the radiator, you can see the 4800U processor used by the Mini PC. In order to see the true content of the chip, it took me a lot of time to clean the thermal grease on the processor. This process is also very careful not to scratch the surface of the chip or damage the electronic components next to it.
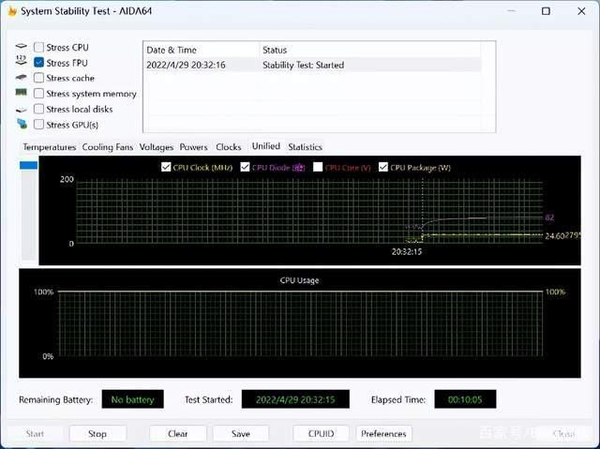
Many people are more concerned about the cooling capacity of this Mini PC. After using AIDA64 to bake the FPU for 10 minutes, the temperature of the CPU is stable at 82°C. Even during the baking process, the noise of the fan is well controlled, and the sound of the fan running is hardly heard.
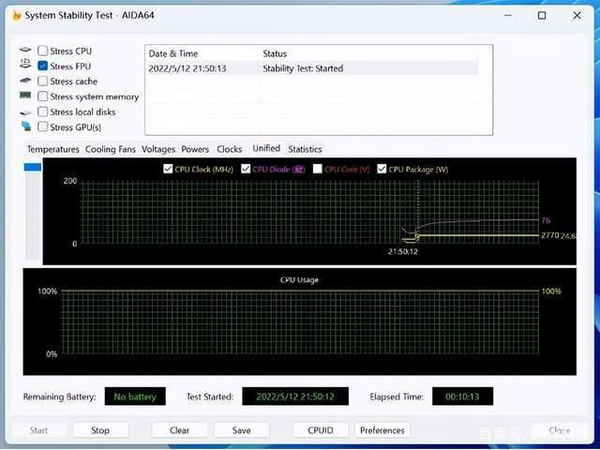
After dismantling the Mini PC, I replaced the Mini PC with silicone grease with better performance. After baking the FPU for 10 minutes, the temperature of the CPU was stable at 76°C, which is 6°C lower than when it left the factory. I believe it should be cooler if replaced with a better silicone grease CPU.
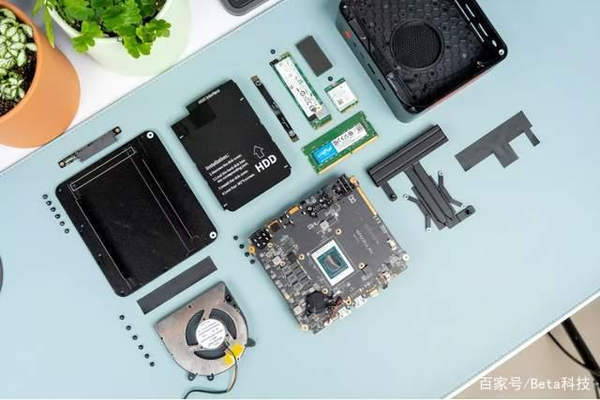
Finally, a family portrait after dismantling. The integration of the whole Mini PC is very high, using 14 screws, the wireless network card antenna and the BIOS battery position are fixed by black glue. It is relatively easy to replace hardware and maintain heat dissipation by yourself, and people with certain hands-on ability can easily get started.


